I think the problem though is that actually building Shortcuts yourself can be quite confusing. But the Shortcuts app has something called the Shortcuts gallery, which is full of super useful shortcuts that Apple themselves have designed.
1. Batch Add Reminders
When you create a reminder in the Reminders app, if you then tap on the ‘i’ or info button next to it, you have the option to add Sub Tasks. So if the task was ‘pack for the weekend’ for example, you might decide to add a load of sub tasks like clean tee shirts, toothbrush, deodorant, camera, whatever you decide you’re taking with you. There’s a shortcut that makes this process really easy, especially if you’re wanting to work with a list of text.
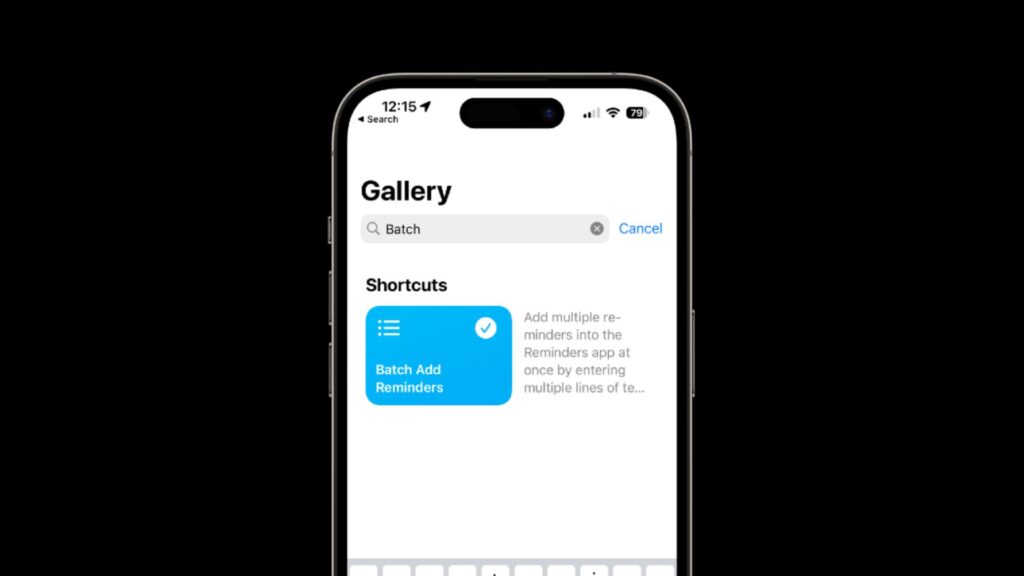
Open the Shortcuts app, head to the Gallery and search for Batch Add Reminders. Tap add to add the shortcut to your Shortcuts app.
There’s a couple of ways that you can run this. The first is to simply open the Shortcuts app and tap on the Shortcut. The first thing you’ll be asked to do is to give the Reminder itself a name, so in this example that would be ‘pack for trip’, and then tap Done. Then on the next screen, you can either type your list in, or copy and paste it in from elsewhere. When you’re finished, tap Done, and while it looks like nothing has happened, if you then open the Reminders app, you’ll see in the Reminders list, your reminder is there, complete with all of the subtasks you just added.
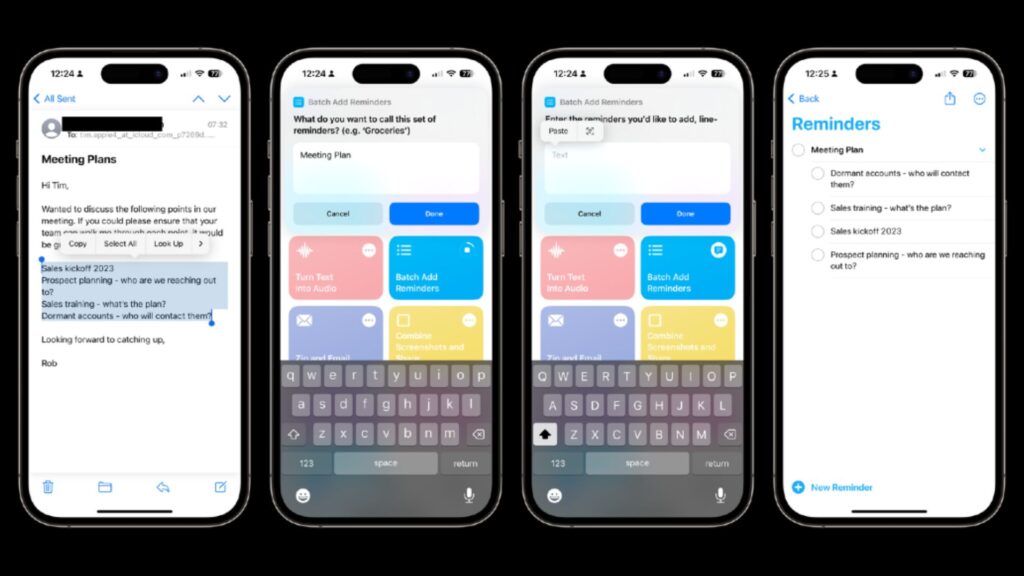
There’s another way that you can do this, and that’s directly from a list of text. In the email example in the screenshot above, I’ve got a list of items that someone has sent over to me, that I want to turn into a reminder. I’ll select the text first, then tap the right arrow until I get to Share, which I’ll then tap on. I’ll then scroll down and choose Batch Add Reminders. Give the reminder a name, and choose Always Allow if you’re prompted to. The shortcut will run, creating a reminder consisting of all the text you just highlighted.
2. Search List on Google
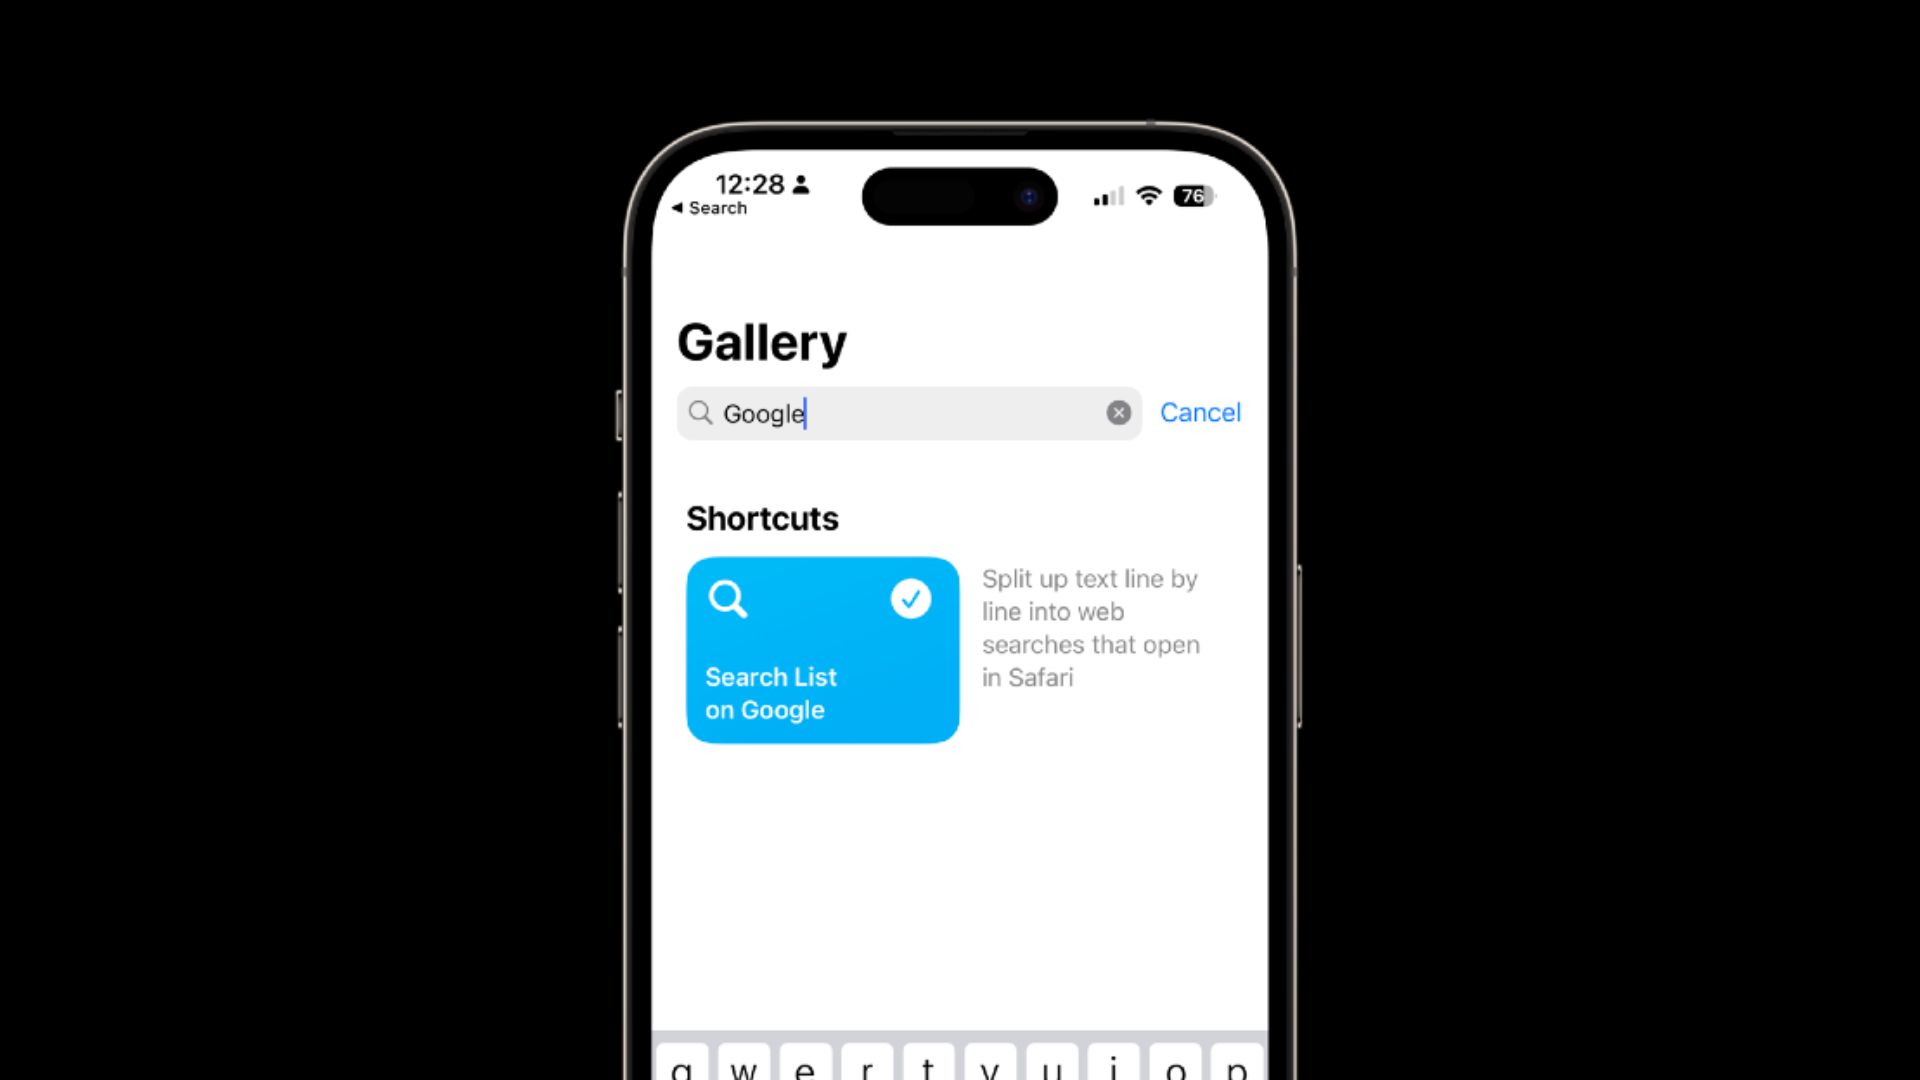
If you’ve got multiple things that you want to search on Google at once, say you’re comparing things in a list, there’s a neat little shortcut that will make this easy for you. Open Shortcuts, go to the Gallery and search for ‘Search List on Google’. Add that shortcut to your Shortcuts app.
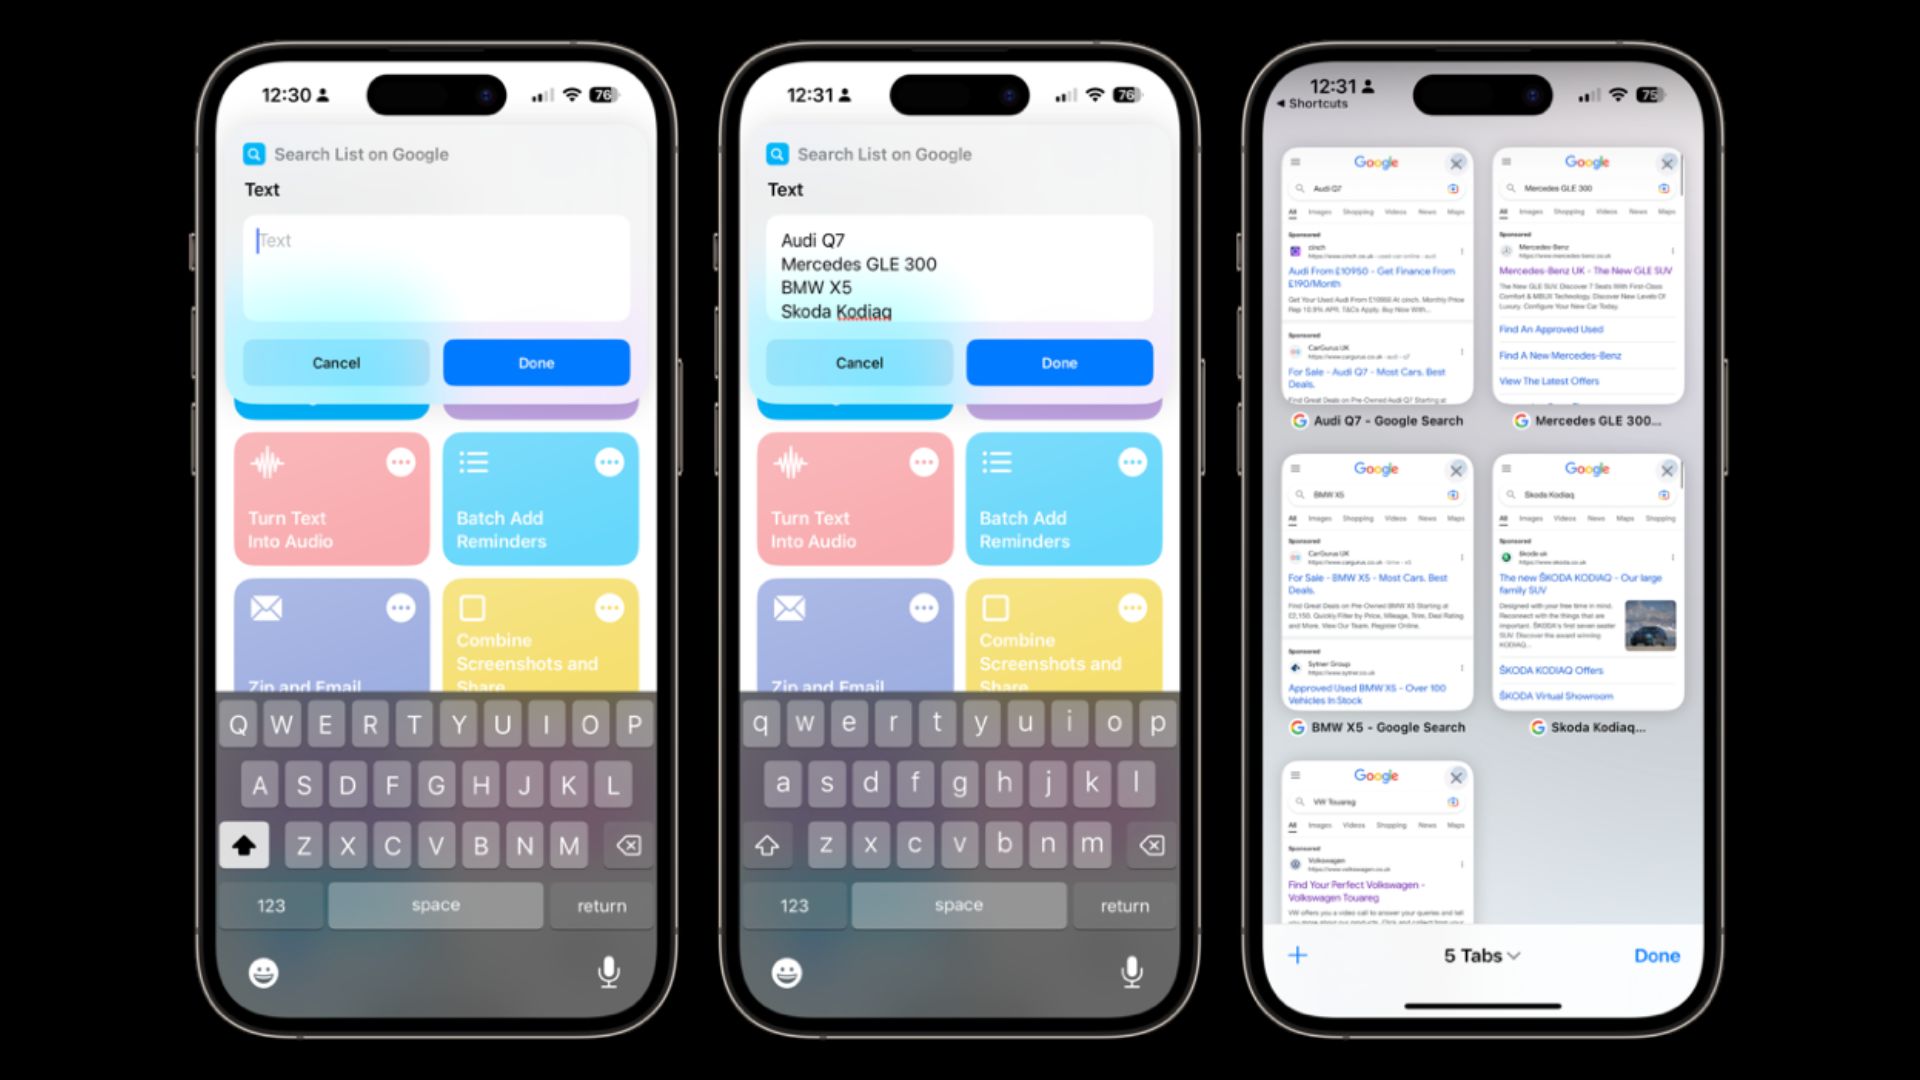
Tap on the shortcut to run it. You’re then going to either type the search terms in, pressing return after each one, or copy and paste them from a list that you’ve got stored in another app, it doesn’t matter how you do it, so long as they end up going in like you see in the middle screenshot below.
When you’re ready, tap Done. Your browser of choice will open, displaying one of the searches, but if you’ve got Safari as your default browser like I have, you just need to swipe left or right at the bottom of the screen to move between the search pages. A really handy little tool if you’re in the process of researching multiple items at once, and you want to quickly jump from a written list, to a set of Google searches.
3. Read body of article out loud
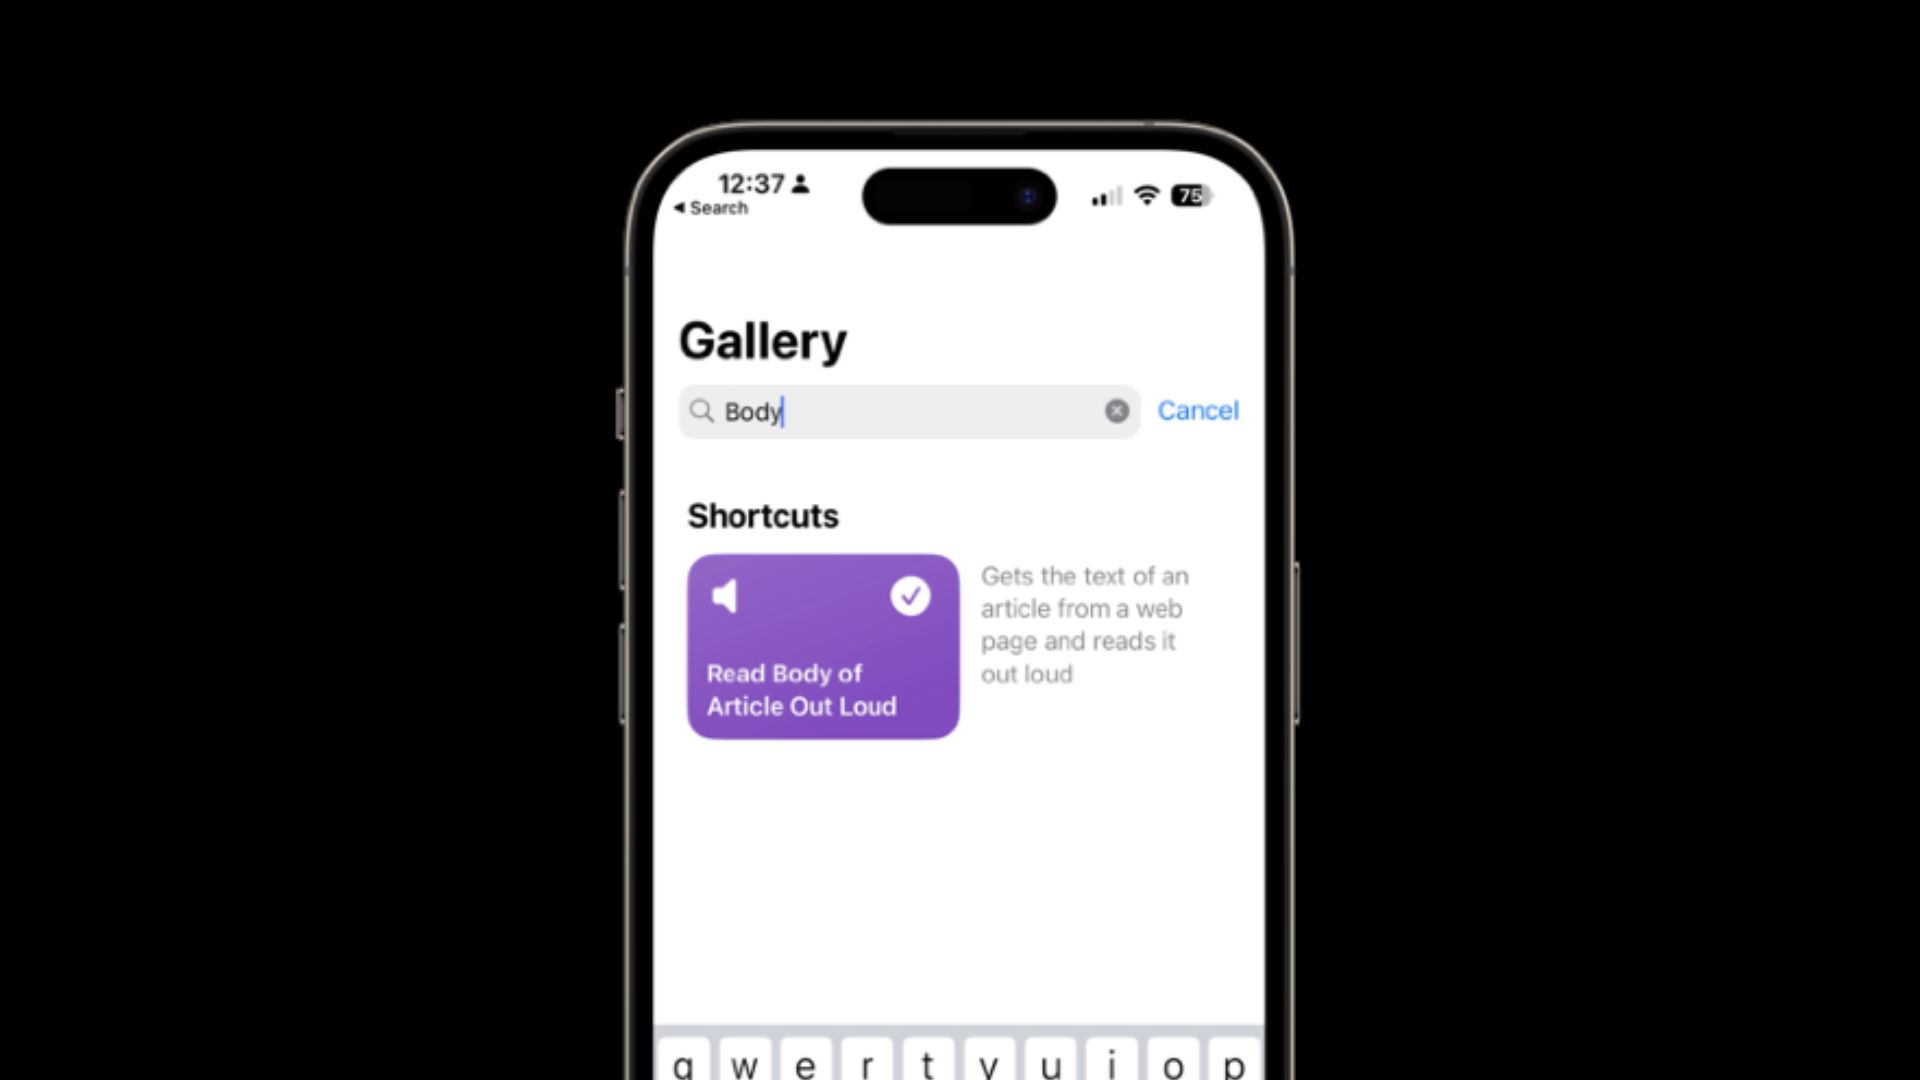
If you go to the Shortcuts app, and then Gallery, and search for Read Body of Article Out Loud, you can add this handy little shortcut to your phone.
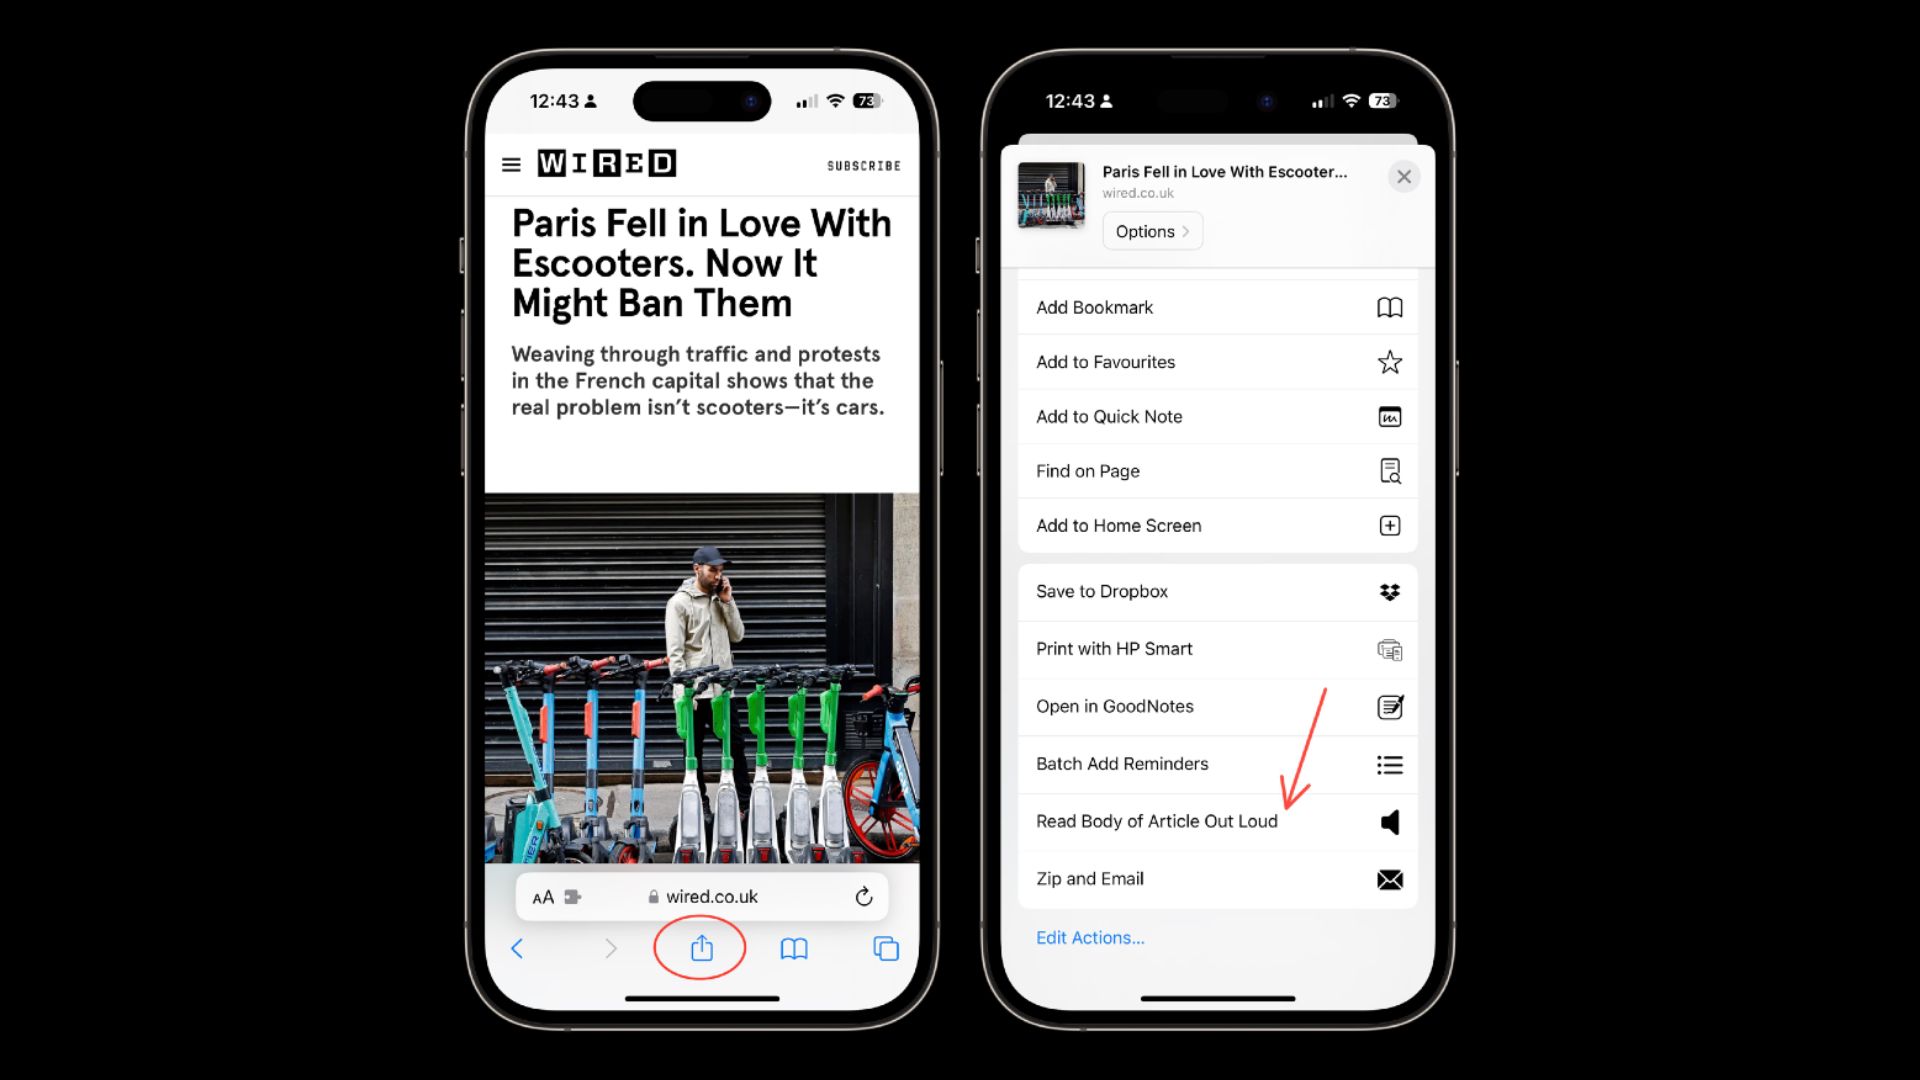
This particular shortcut is going to run from a Share Sheet, not from the app. So what I’m going to do is navigate to an article in Safari, I’ve got this tech article up in the example below, and then I’m going to tap on the Share button down at the bottom of the screen, and scroll down until I see ‘Read Body of Article Out Loud’. Tap that button, and if you’re asked to grant permission, make sure you allow all, otherwise this won’t work.
Once that’s done, your phone will begin reading out the body of the article in a pretty awful but very usable tone of voice.
4. Combine screenshots & share
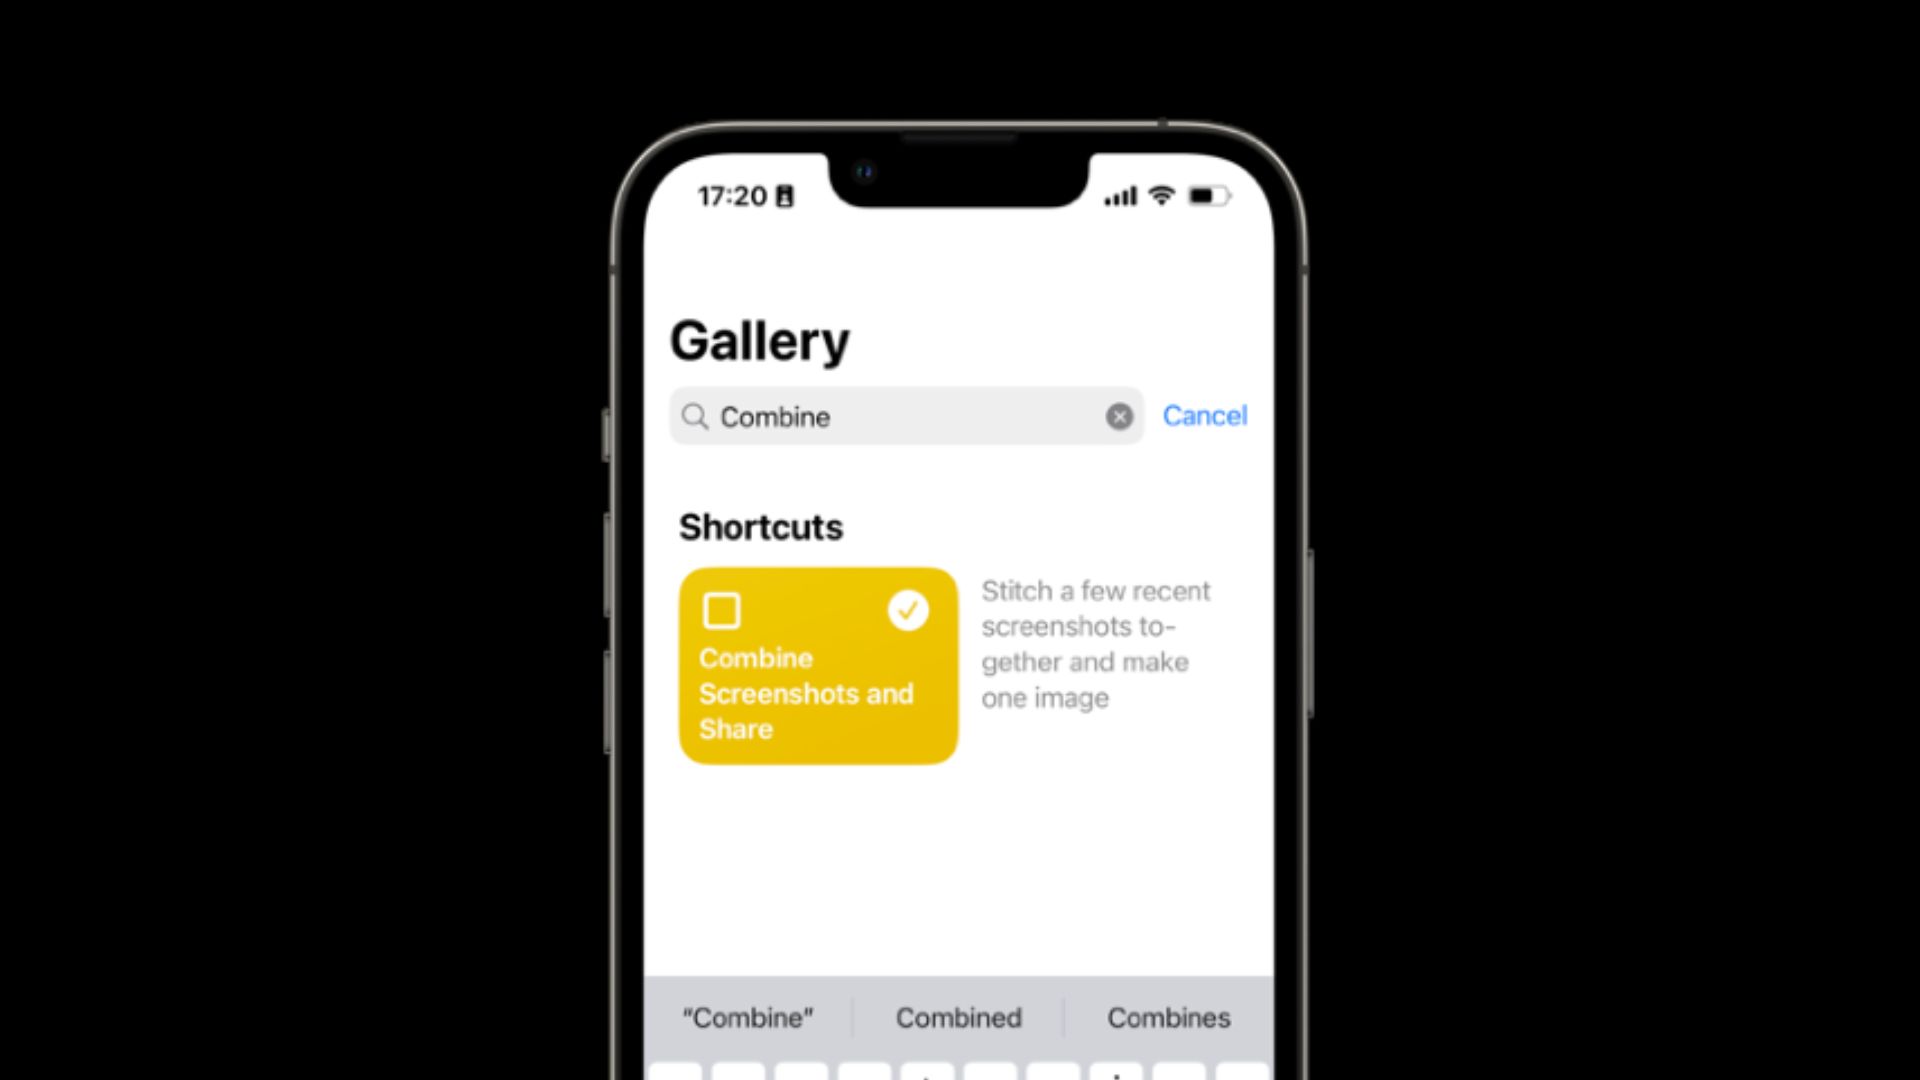
Let’s say that you’ve captured a load of screenshots on your iPhone, and you now want to send those screenshots as a single image to someone, rather than having to attach and send them one at a time. Open the Shortcuts app, go to the Gallery, tap on Search, and look for Combine Screenshots and Share. Add it to your Shortcuts app by tapping the plus button.
Rather than selecting screenshots directly from your photo library, the shortcut is going to work backwards, and select however many screenshots you tell it to select, starting from the most recent in your photo library. So in the example below, I’ve got a few screenshots mixed in with some regular photos and also a video, but the way this shortcut will work, is it will start with the most recent screenshot, and then combine it with however many screenshots I tell it as it works backwards. So let’s tap to run the shortcut, and where it says Number of Screenshots, I’m going to use the plus button to make this three. I’ll then choose Done, and the shortcut will run, and create an image with the three screenshots sat side by side.
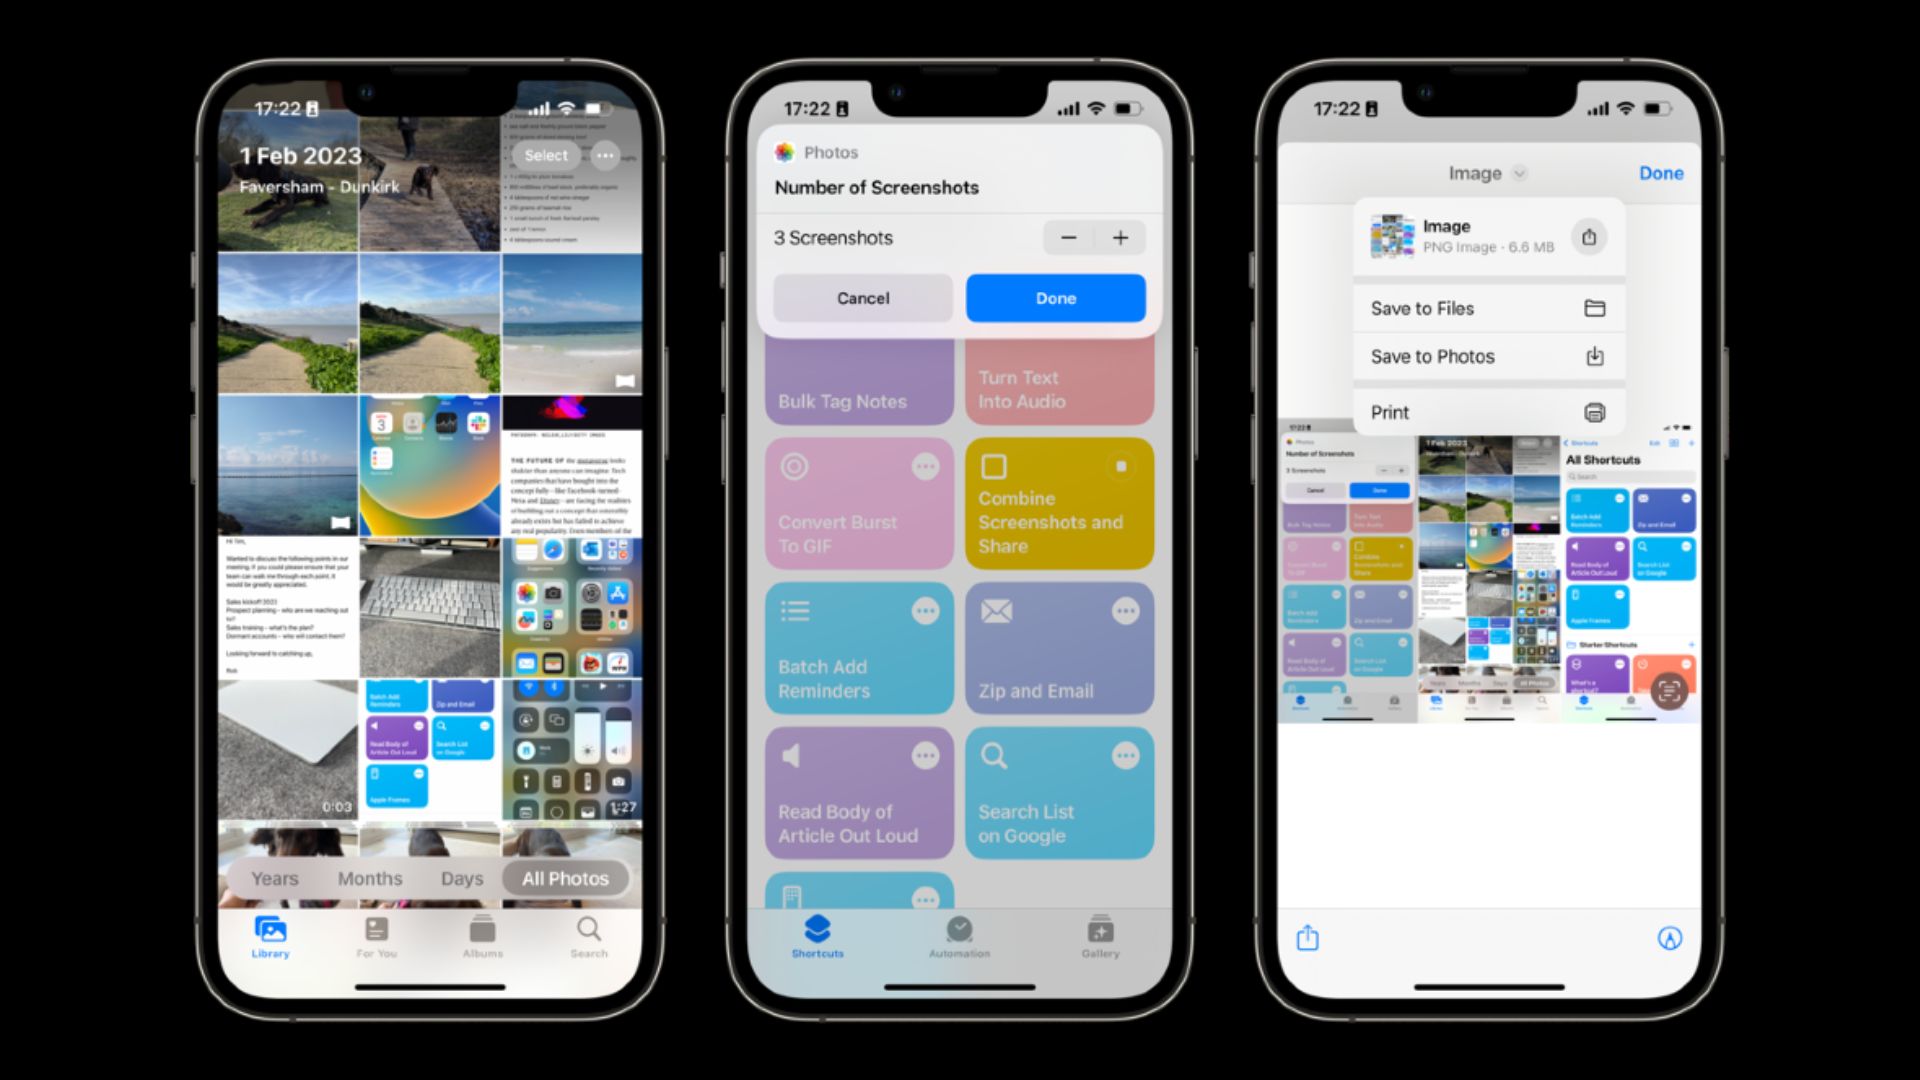
If you tap on where it says Image up at the top, your phone will show you the file type, and give
you quick access to saving this to your files or to your photo library, or printing, and if you tap on
the Share button, you’ve got the usual Share Sheet options relevant to your device. You also
have the same Share button down in the bottom left of the previous screen, as well as a markup
button, if you wish to mark the image up before sending it on.
5. Bulk Tag Notes
You can tag notes in the notes app, it makes it easier to search for them later on. The problem is, the tagging function is a relatively new feature, and it’s possible that you, like me, might have been using the Notes app for a long time. If that’s the case, going back through and tagging old notes can be a real pain, and that’s where this shortcut comes in really handy.
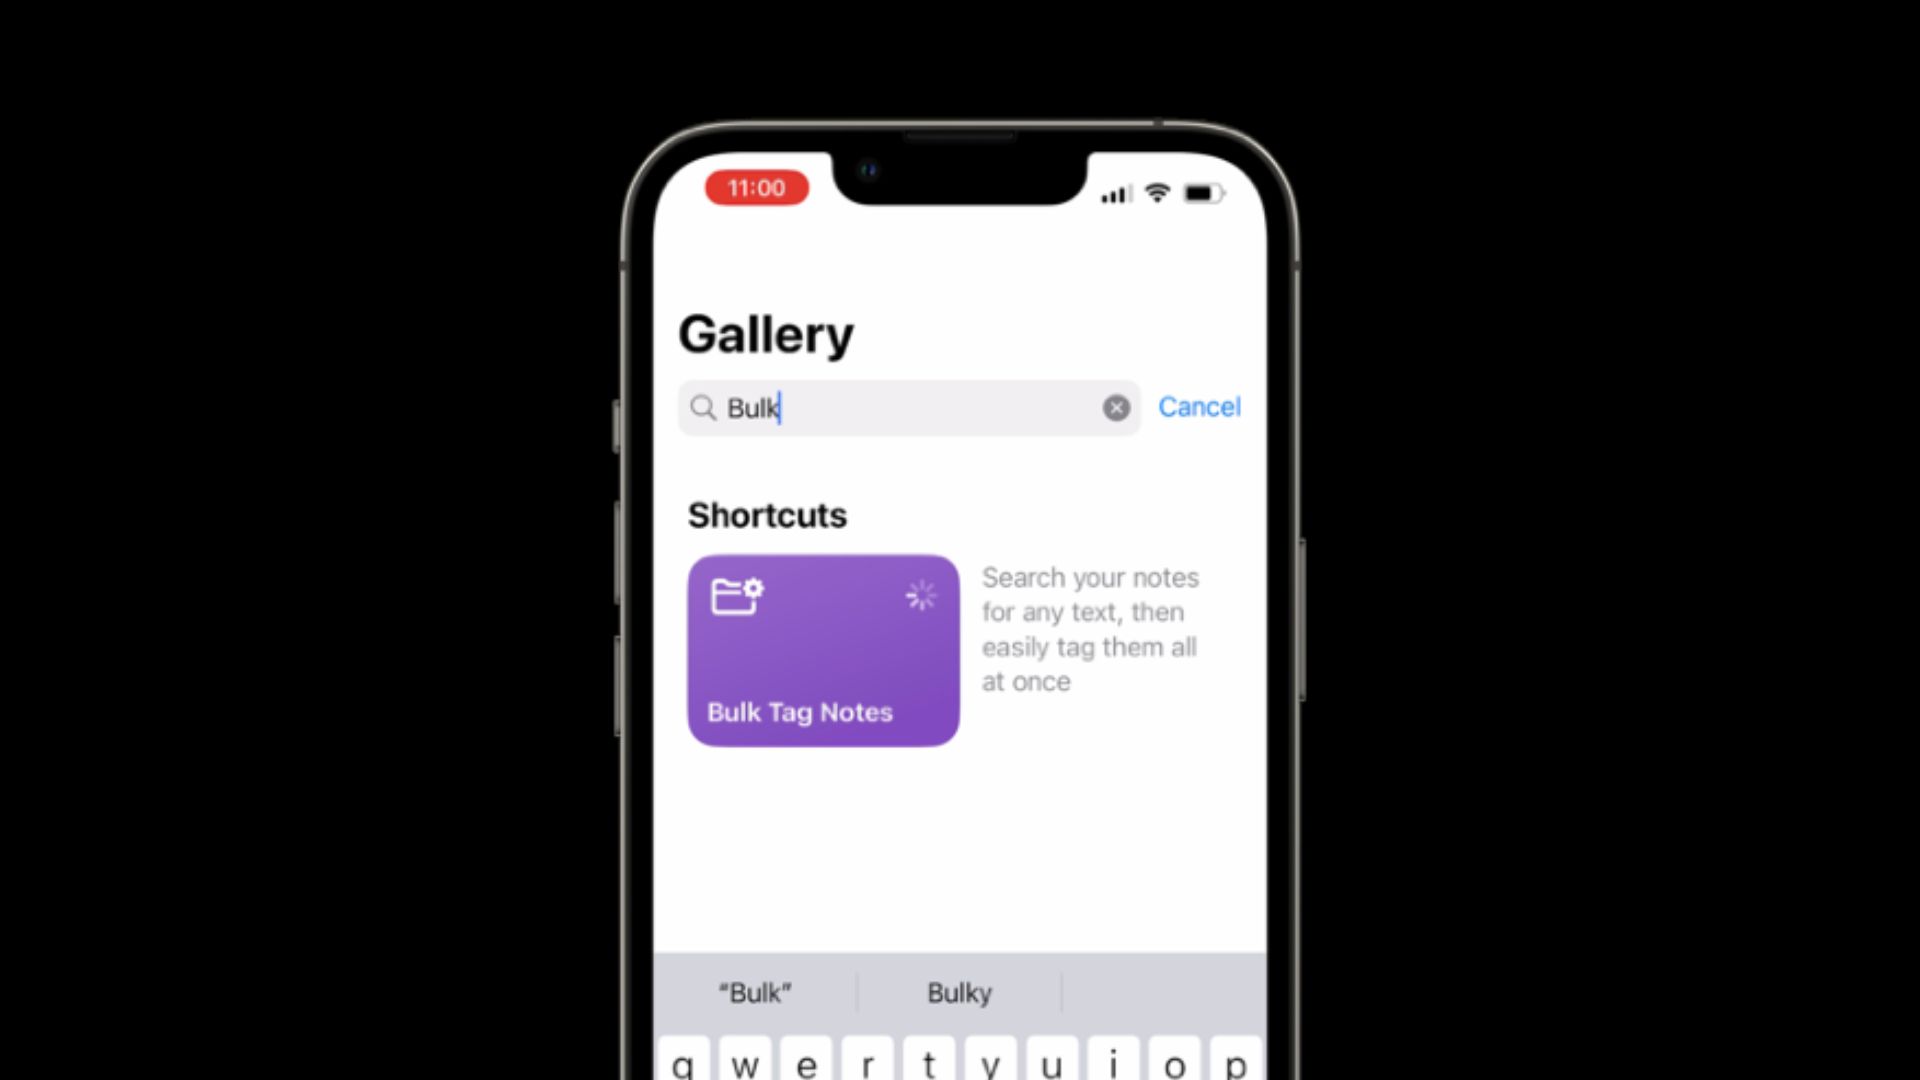
Go to the Shortcuts app, head to the Gallery, search for Bulk Tag Notes. Add it to your Shortcuts.
Then, when you’re ready, open the Shortcuts app and tap on the Shortcut. The way this works is that you’ll set a criteria for what you want the shortcut to tag initially, and you do this by inputting a word or phrase in the box that shows. When you tap Done, the shortcut will come back with a list of notes that you can tag. They’ll all be selected by default, tap to uncheck any that you don’t want to be included in the bulk tagging. When you’re happy with your list, choose Done. Then in the box that shows up on the next screen, input the tag that you’d like to insert. You don’t need to include a hashtag icon, just the word will do. Tap Done, and the process will run in the background. When finished, if you head into Notes and call up one of the Notes that you ran the process on, you can see that your tag has been added down at the bottom of the note.
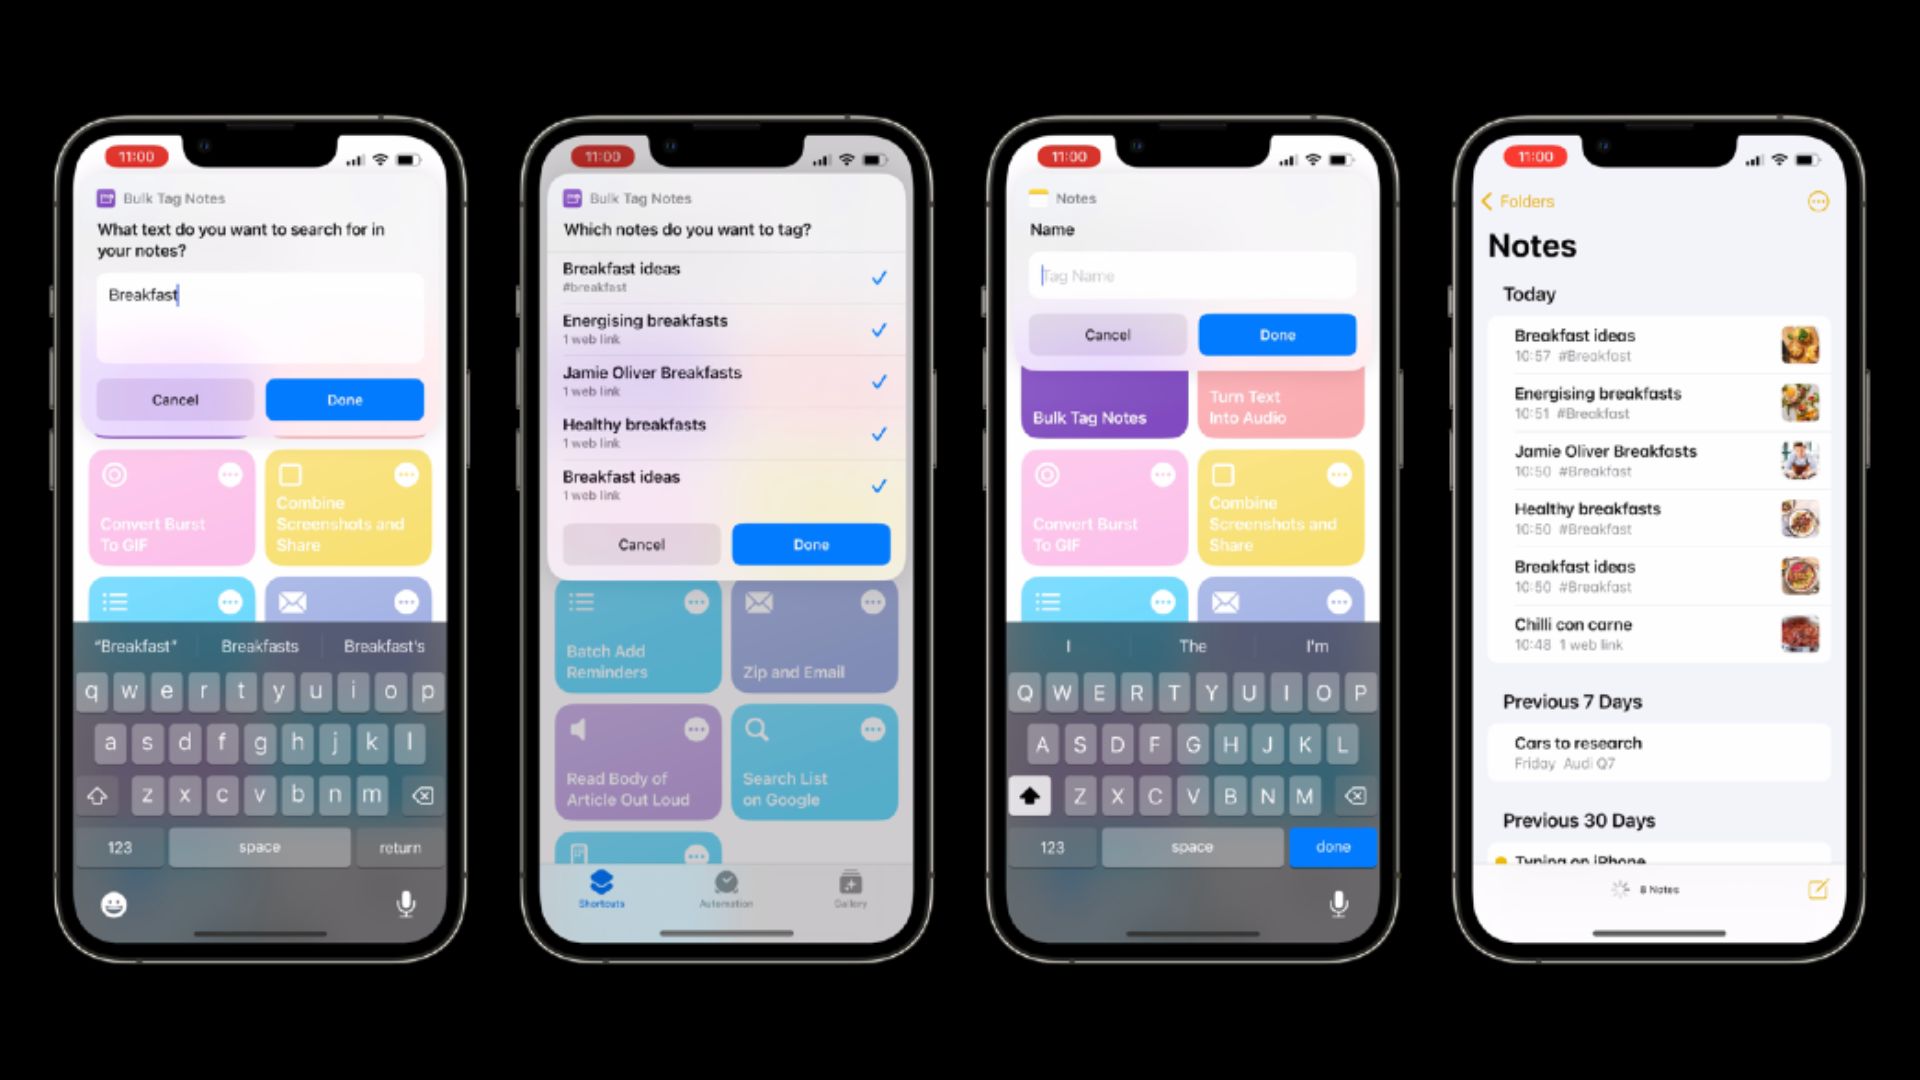
So far, I’ve done this with relatively small quantities of notes, you can of course do it with as many as you like, just keep in mind that if you’re doing this with huge quantities, the process may take longer for you than it did for me in this video, but this is a really quick way of getting your notes tagged in no time.
6. Convert Burst to GIF
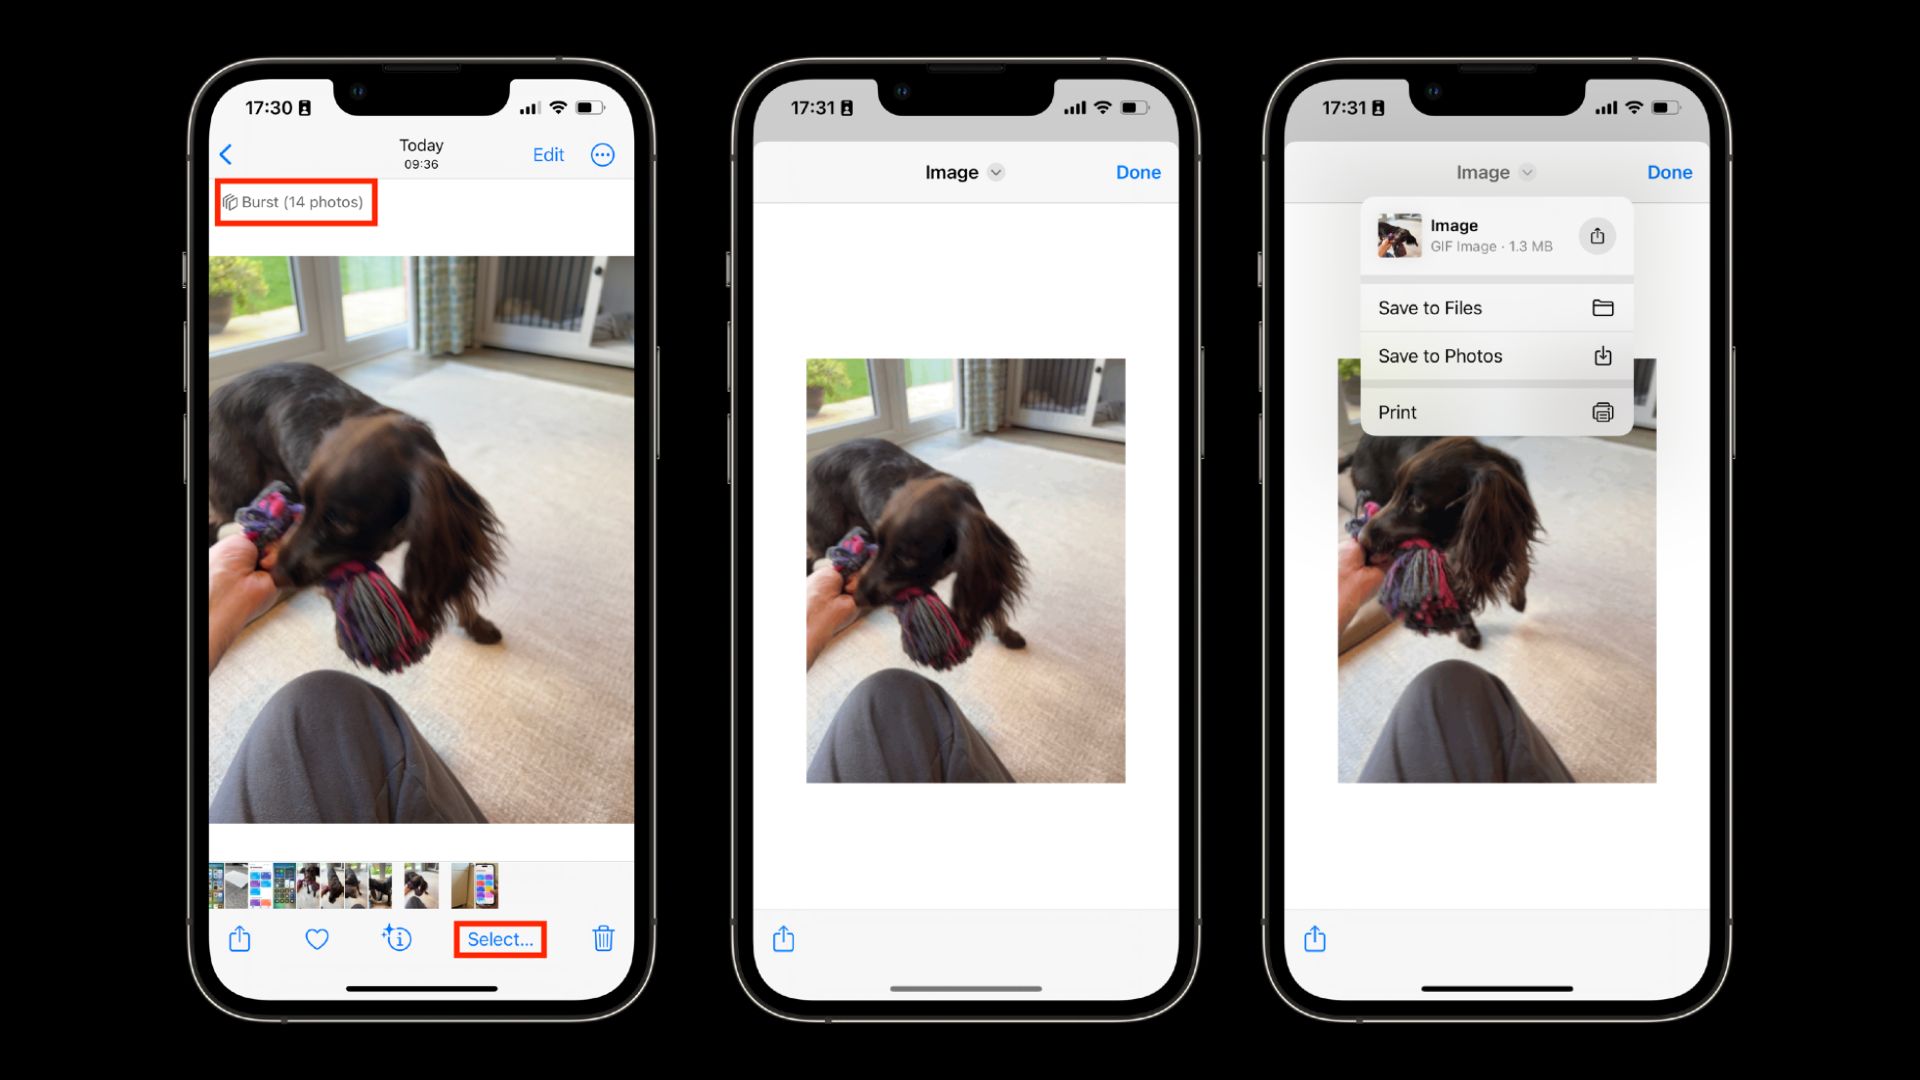
Burst photography is one of those iPhone features that I think a lot of people forget exists. Basically, when in the Camera app, if you tap and hold the shutter button and in a quick motion, swipe to the left and continue to hold, your camera will take burst photography, the same as you see paparazzi and nature photographers doing with their high-end cameras. The end result is a burst of photos, and you can see it’s a burst because when you view the photo after, you’ve got the word Burst, and the number of photos up at the top left. Down at the bottom it says Select, and you can use that to work through your photos and pick out the ones that you want to keep.
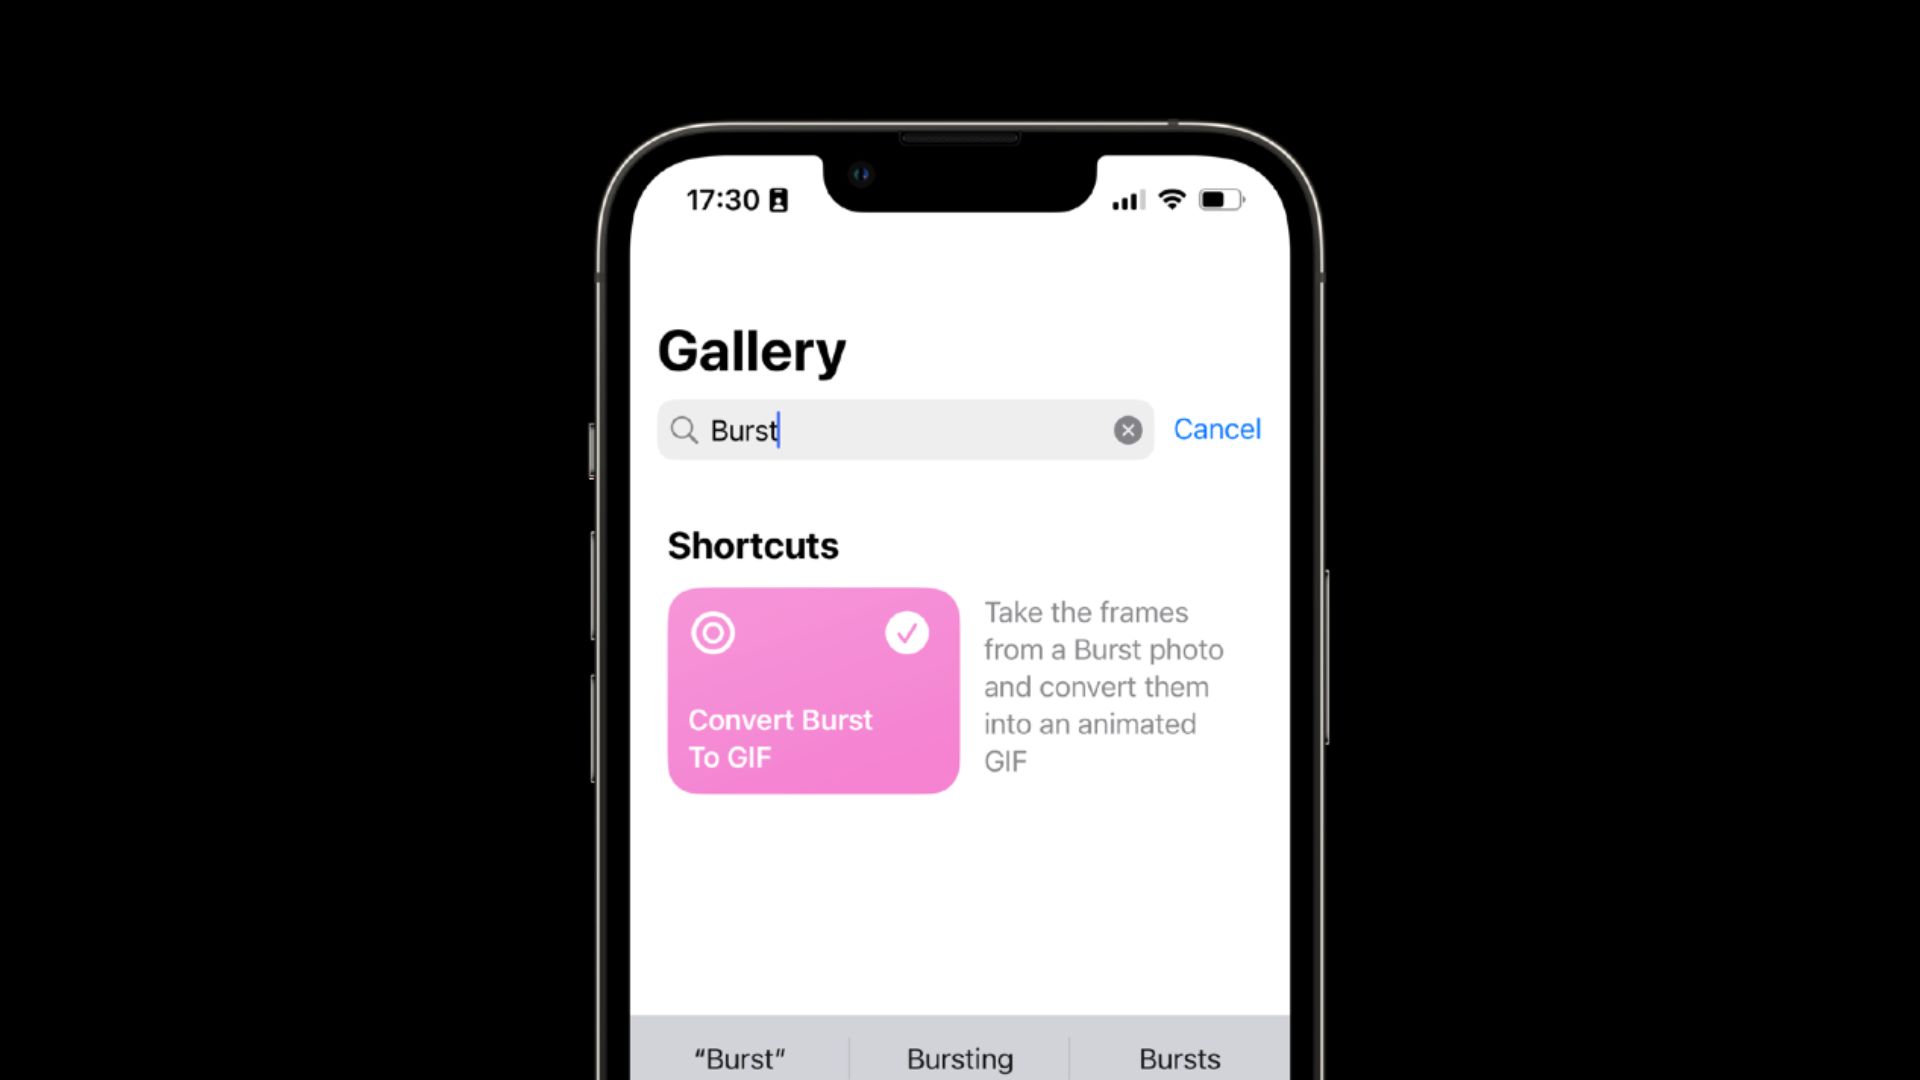
But here’s another thing you can do with your burst photos. Open the Shortcuts app, go to the Gallery and search for Convert Burst to Gif. Tap to add it to your shortcuts.
Then in the Shortcuts tab, tap on the shortcut itself to run it. Your phone will display only the Bursts from your photo library. Choose the one that you’d like to run this shortcut on. Your phone will then display the Gif that it’s just created. Tap Done, and you’ll then get a prompt asking you what you’d like to do with it, you can either save it to your camera roll, or share it.
7. Zip and Email
I mentioned in a recent video, how you could use the Files app as a kind of hack for zipping photos that you could then send on to someone. Well if you’re sending by email which you most likely are, there’s an even easier way, and that’s to use this Shortcut.
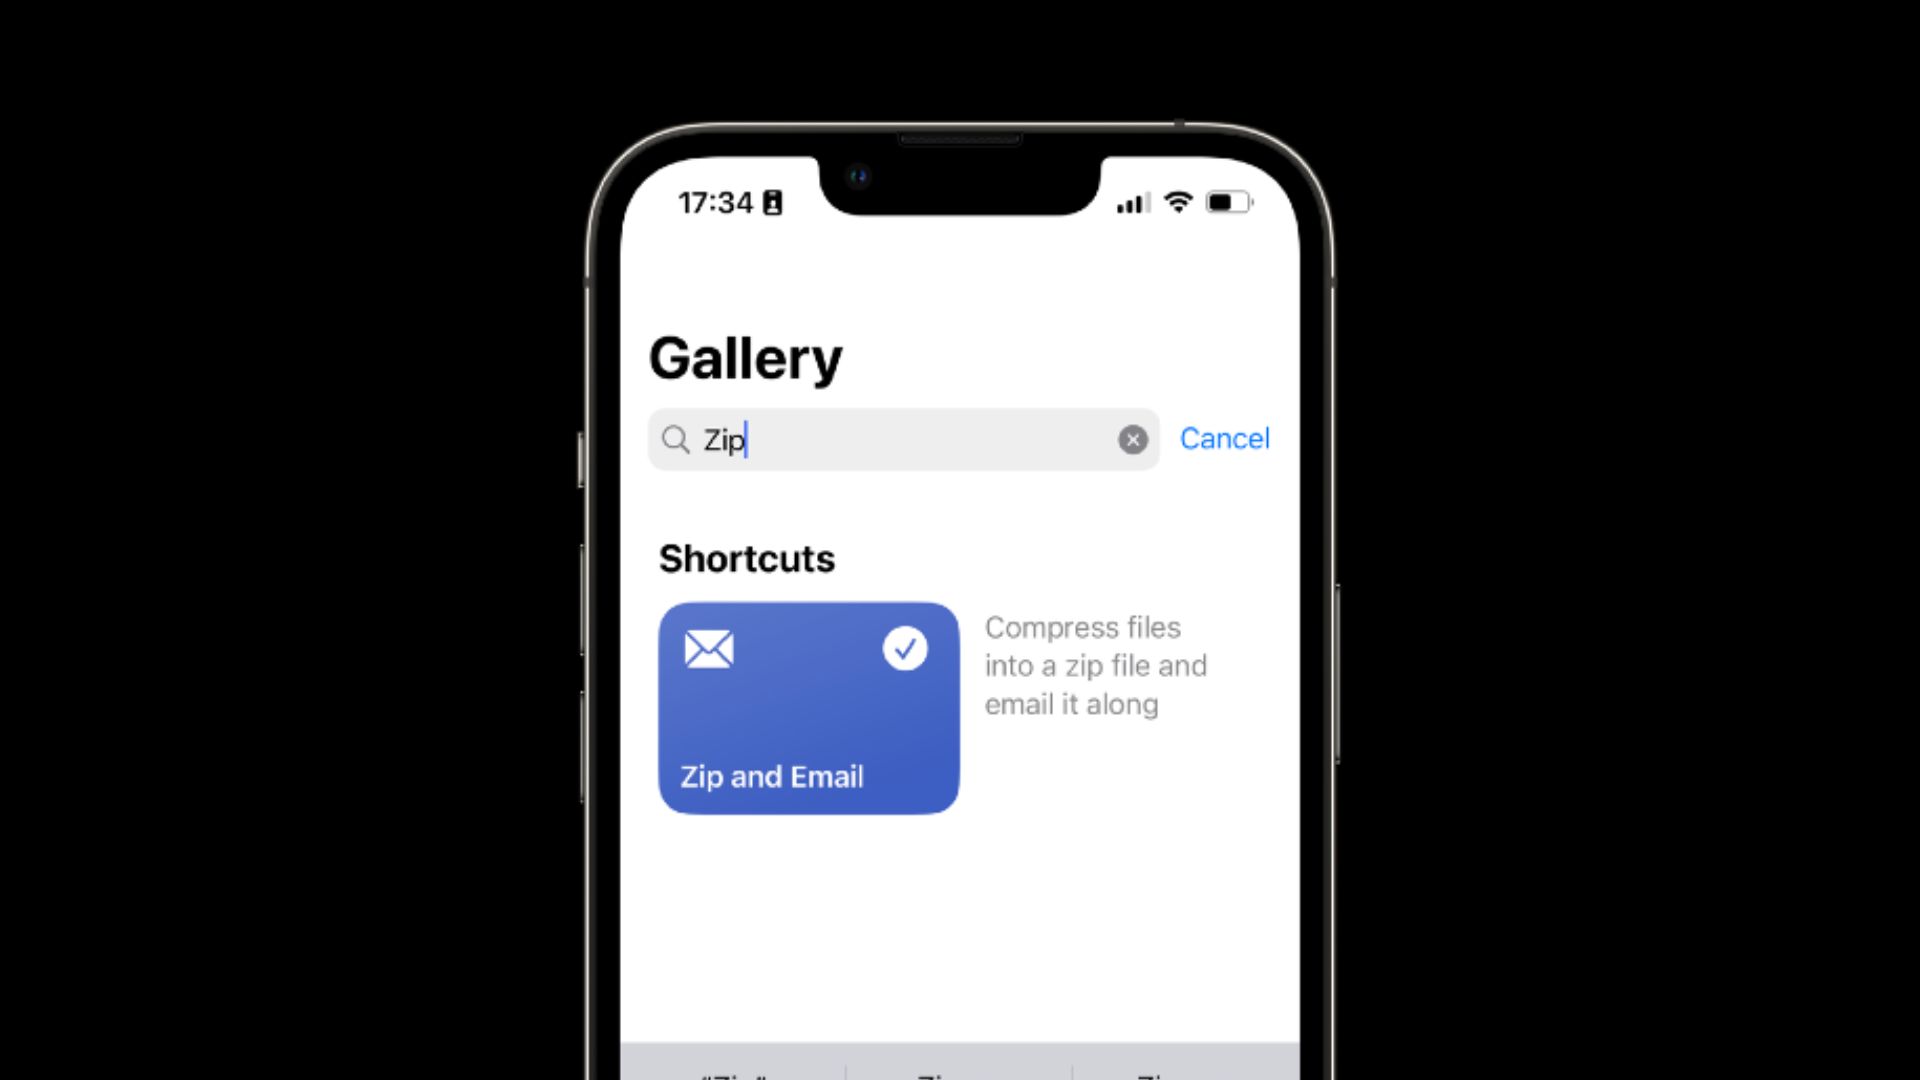
Head to the Shortcuts app, go to Gallery, search for Zip and Email. Add it to your shortcuts app.
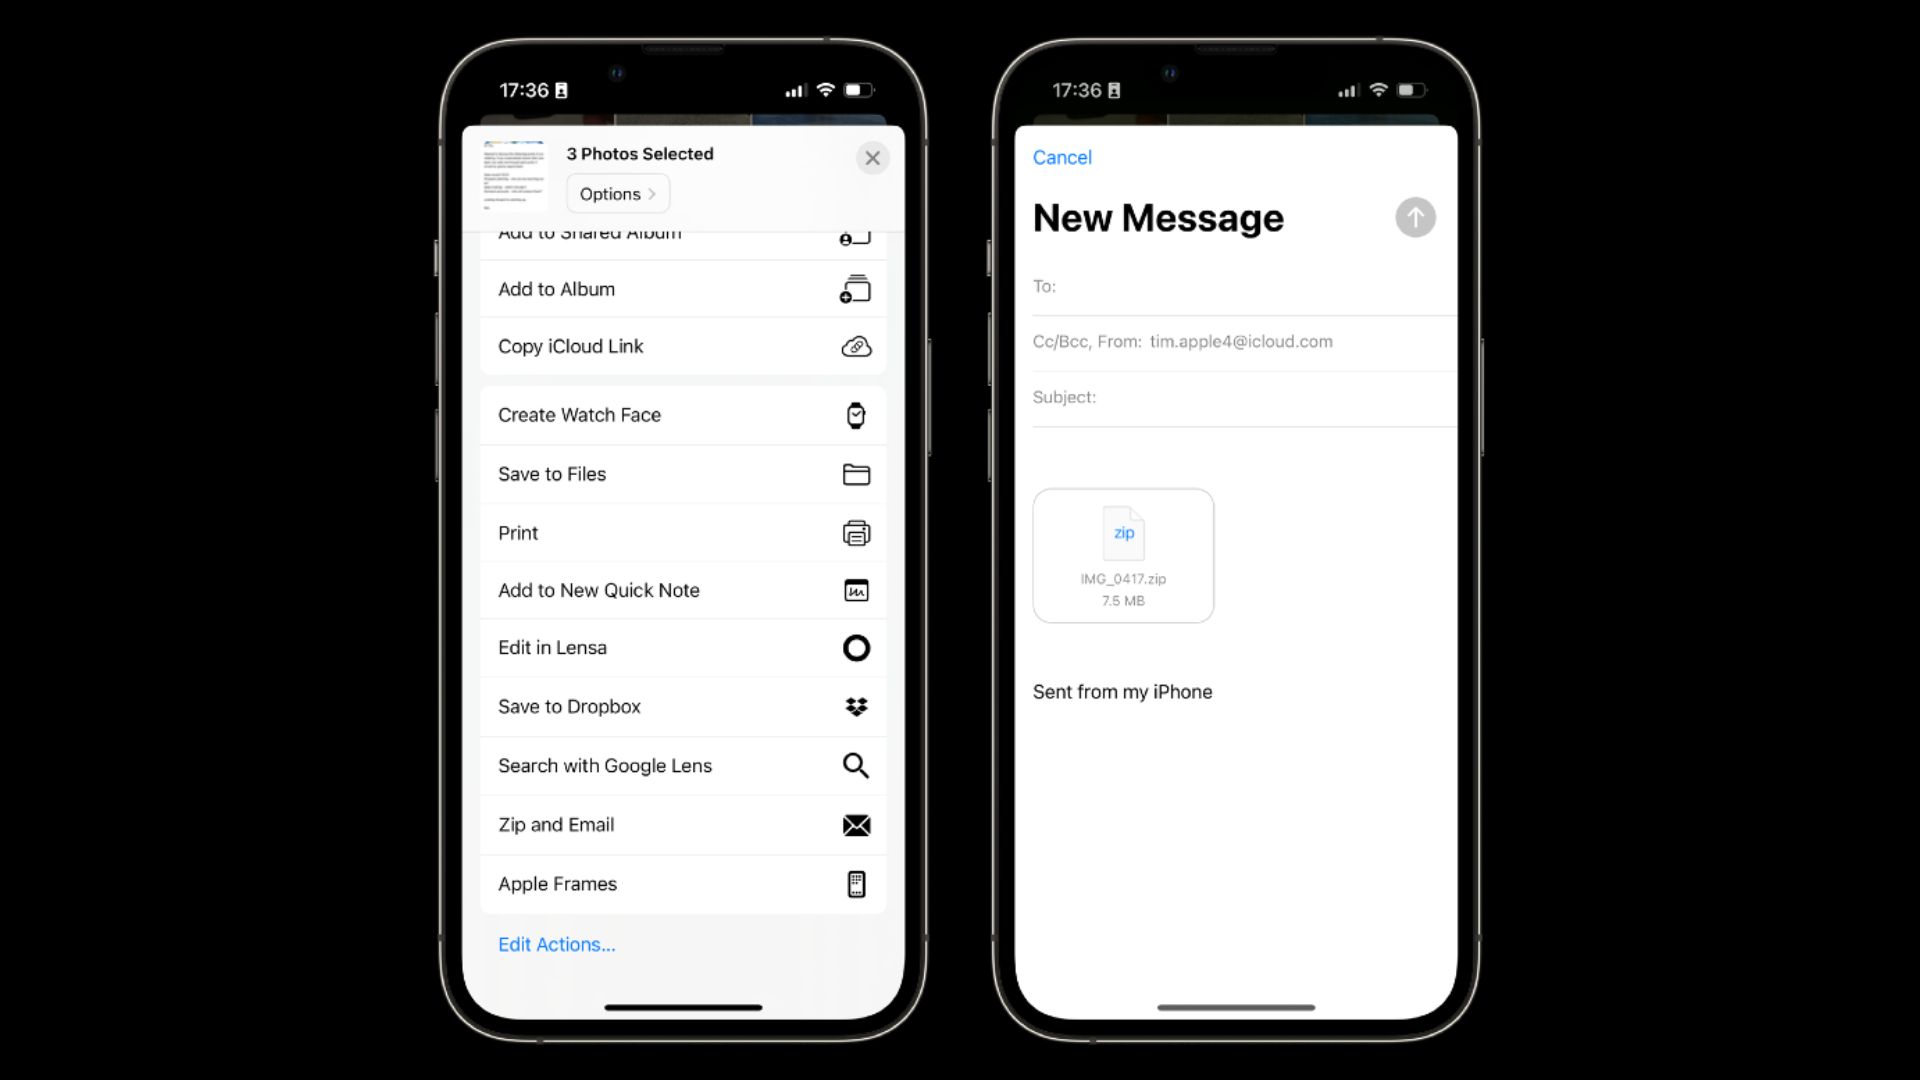
The way that this particular shortcut runs is via the Share Sheet, which actually makes this one even easier to run. So with the shortcut added, what we can now do is head to the Photo library, and select a few photos. I’ll then tap the Share button down in the bottom left of the screen, then scroll down and choose Zip and Email. In a flash, the app will zip the files for you, and then add them into an email, ready for you to add some text to and hit send.
What’s also good about this shortcut, is that it also works in the Files app, not just the Photos app. So you can also use this to zip a bunch of PDFs together, or spreadsheets, or whatever you might be working on in the files app, and then email them out. In fact I even got this to work in.
8. Turn Text into Audio
If you have large passages of text that you’d prefer to have read to you rather than having to read it, perhaps an article or a document that you’ve been sent, and you want to listen to it in the car or while you’re on the treadmill maybe, there’s a shortcut that will allow you to turn any text into spoken audio. The audio quality isn’t amazing, but it’s usable, so here’s how you’d do it.
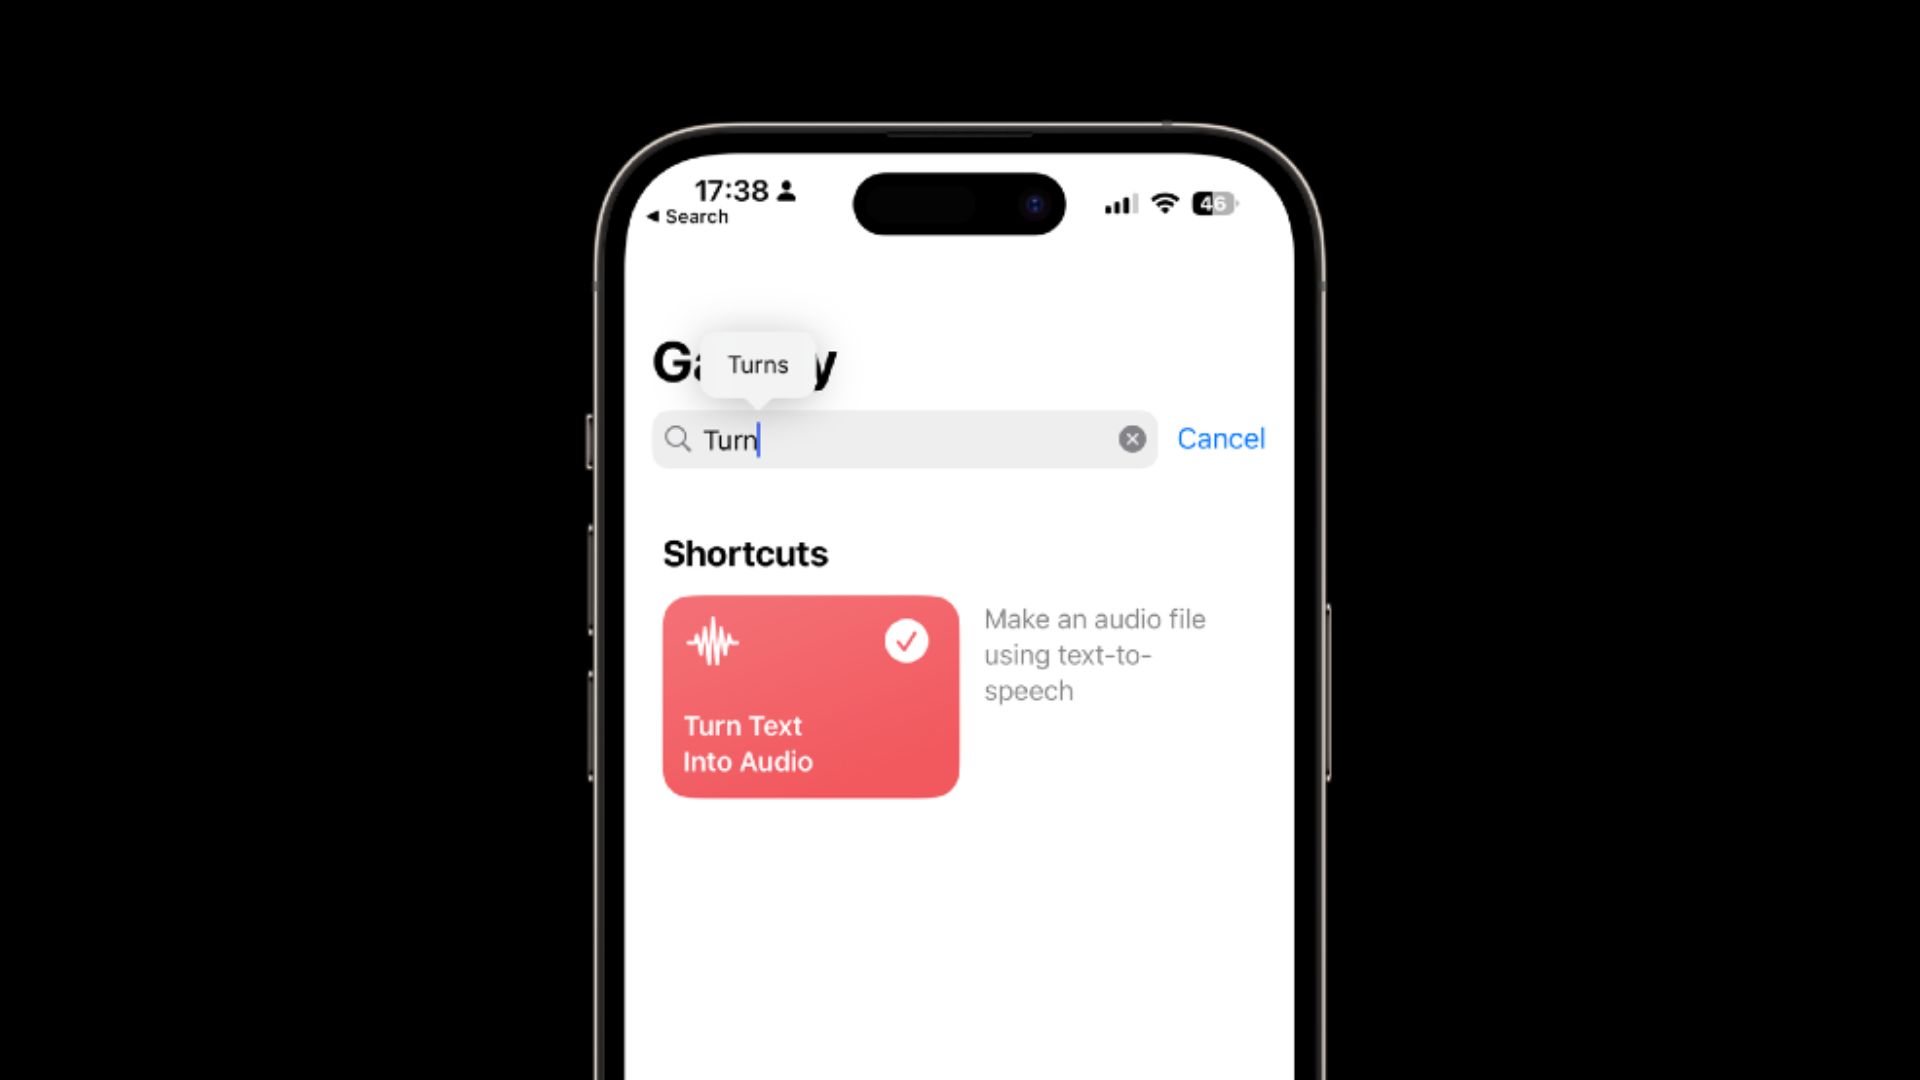
Head to the Shortcuts app, go to the Gallery and then search for Turn Text into Audio. Tap the plus to add it to your Shortcuts app.
This one works very simply – you’re going to find the passage of text that you want to use, select it and then copy it to your clipboard. Then go to the Shortcuts app, and run the shortcut. Tap and choose paste to paste the text into the box here, and then choose Done. The audio file has been created, and if you tap the Share button in the bottom left, I’d then recommend that you save this audio file to your Files app by choosing Save to Files. You can then come back to it later on by accessing it in the Files app, and of course you can play the audio when you’re ready.
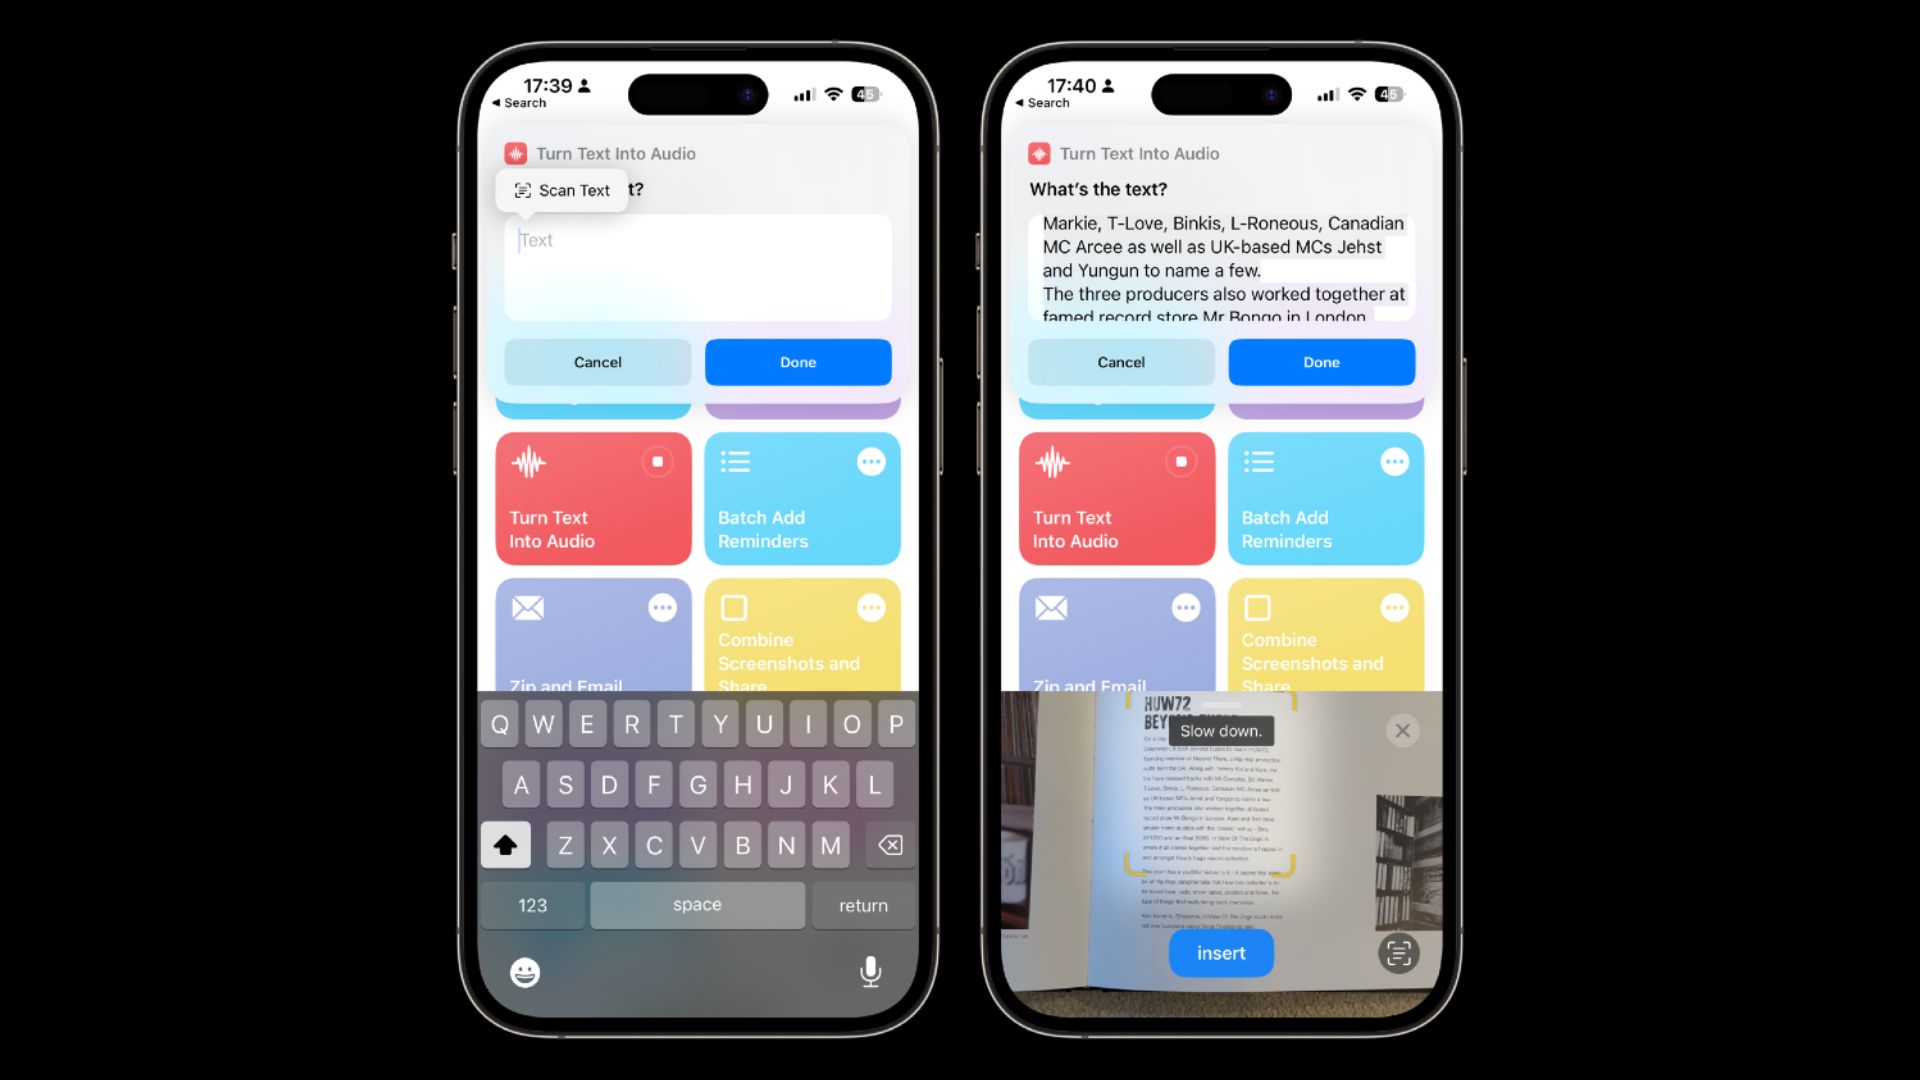
But here’s a really cool method for using this. Let’s say you’ve got a magazine article, as in an actual written article, and you’d like to turn that into spoken audio. Run the shortcut, like we did before, and then tap into the text box, but with nothing on your clipboard. You won’t get the Paste option, but you will get an option to scan text in. Hold your phone until you’ve got the text lined up, and when it shows in the box, tap Insert.
Your phone will use Live Text to insert the text, and you can then create an audio file like we did before, although I believe you do need an iPhone XS or newer for this particular hack to work.